How Can We Help?
Contact Center Agent Announcements
- Concept
- Rules
- Example
- Configure the Feature in the PBX Portal
- Configure Announce to Agent Message
- Configure a Queue Agent’s Request Confirmation Attribute
Concept
Announce to Agent is a powerful way to further assist Queue Agents in preparing for and effectively handling calls. It allows the system to play a message prior to the Queue dispatching the call to the Agent, and the Agent accepting a call. This provides the Queue Agents an additional level knowledge about the call, previous to actually taking the call. It has many real-world applications, especially in a call center environment.
Definitions
Request Confirmation – a feature which allows the system to query a callee to find out if they would like to accept the call or let the call return to its previous destination.
Rules
Request Confirmation must be set under the Queue Agent inside the Edit Agents area of the Call Queue for the system to actually play the Announce to Agent.
Example
This feature would be best used by a company interested in providing auditory information to their Queue Agents prior to the call beginning, such as “This Caller is responding to Post Card #2315,” or “This is a call from the Northwest Sales Line.”
It would also work very effectively for an organization which had Agents in multiple Queues simultaneously and wanted to ensure that Agents answered higher priority calls first.
Configure the Feature in the PBX Portal
An Announce to Agent message must be recorded for a specific Call Queue in order for that message to be played to Agents prior to them accepting calls.
You must enable Request Confirmation under the Queue Agent inside the Edit Agents area of the Call Queue for the system to actually play the Announce to Agent message.
Configure Announce to Agent Message
In the PBX Portal go to Domain > Call Queues
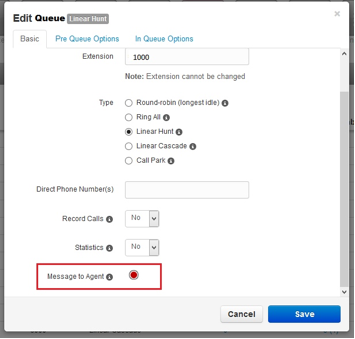
- Click the Call Queue name under the Name column. This will load a modal box.
- Under the Message to Agent heading, click the round, red, Record Icon. The modal box should look similar to the following:
- Under the Message to Agent heading, the area will change and allow you to enter a number to be called at, to facilitate the recording. Enter the number you would like called and click the small telephone handset icon.

- For the Request Confirmation field, check the checkbox
- Click Save in the bottom of the Call Queue modal box. You will be taken back to the Call Queue page
- If you wish to check the Announce to Agent message you may click on the Call Queue name, under the Name column to hear your changes. You will now see that there is a play button and a download button, which may be used to listen to the message. You may also re-record the message at any time if you wish.

Configure a Queue Agent’s Request Confirmation Attribute
Request Confirmation must be set under the Queue Agent inside the Edit Agents area of the Call Queue for the system to actually play the Announce to Agent.
In the PBX Portal go to Domain > Call Queues
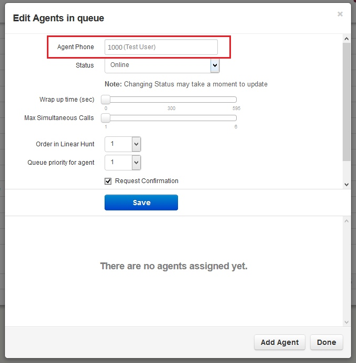
- Click the Agent count link, usually in blue, under the Agents (Available) column. This will load a modal box.
- If you are adding a new Queue Agent, you will need to click Add Agent and then you will need to enter a phone number under the Agent Phone field.
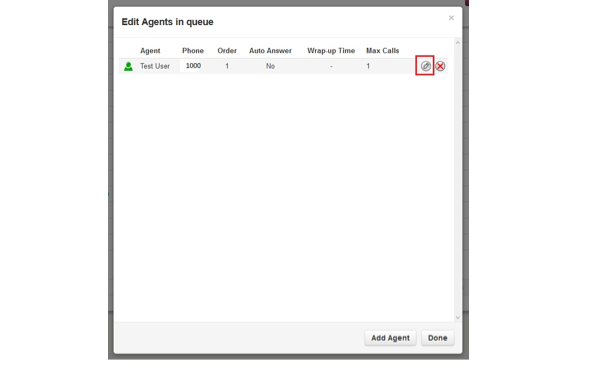
- If you are editing an existing Queue Agent hover over the Agent you would like to edit and then click the pencil icon on the right side of the modal box.
- For the Request Confirmation field, check the checkbox

- Click the Save button.
- Click the Done button, in the bottom right corner, and the setup is now complete.
- You may test your Announce to Agent feature.