How Can We Help?
PBX Text-to-Speech
TTS (Text-to-Speech) Overview
TTS (Text-to-Speech) is a feature that allows a user to type a message and have the message audibly spoken to recipients. TTS enables you to set professional sounding greetings and other messages that can be easily modified without the need to record or upload files.
Note: TTS can be applied to many different greeting and message options within the PBX Portal, including Voicemail Greetings, Auto Attendant Greetings, and more.
Where to Use TTS and How to Enable
You can use Text-to-Speech as the greeting in the areas listed below:
- Domain Default Voicemail Greeting
- User’s Voicemail Greeting
- User’s Recorded Name
- Auto Attendant Intro Greeting and Main Greeting
- Auto Attendant “Play Message” Option
- Call Queue Message to Agent
How to use TTS
All of the applications mentioned above have very similar methods for enabling TTS by utilizing the existing options within the portal.
As one fully detailed example, to enable Text-to-Speech for a user’s Voicemail Greeting, please do the following:
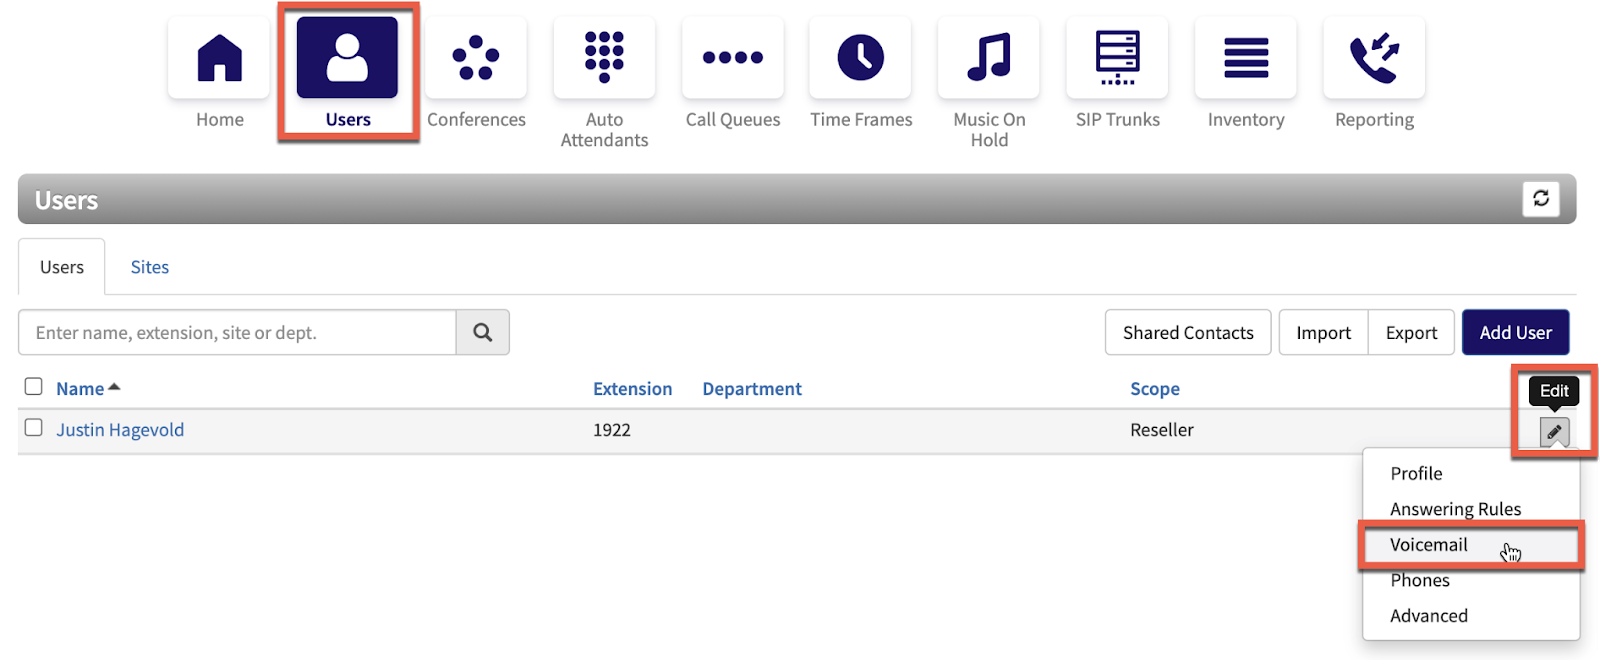
- Click the ‘Users’ tab located at the top left of the screen.
- Search and select the user that you want to enable Text-to-Speech and click the ‘Edit’ button.
- Click the ‘Voicemail’ tab for the selected user.
- Locate the ‘Greetings’ section and to the left of ‘Voicemail Greeting,’ select the ‘Manage/Edit’ icon.

- Click the ‘Add Greeting’ button at the bottom of the menu.
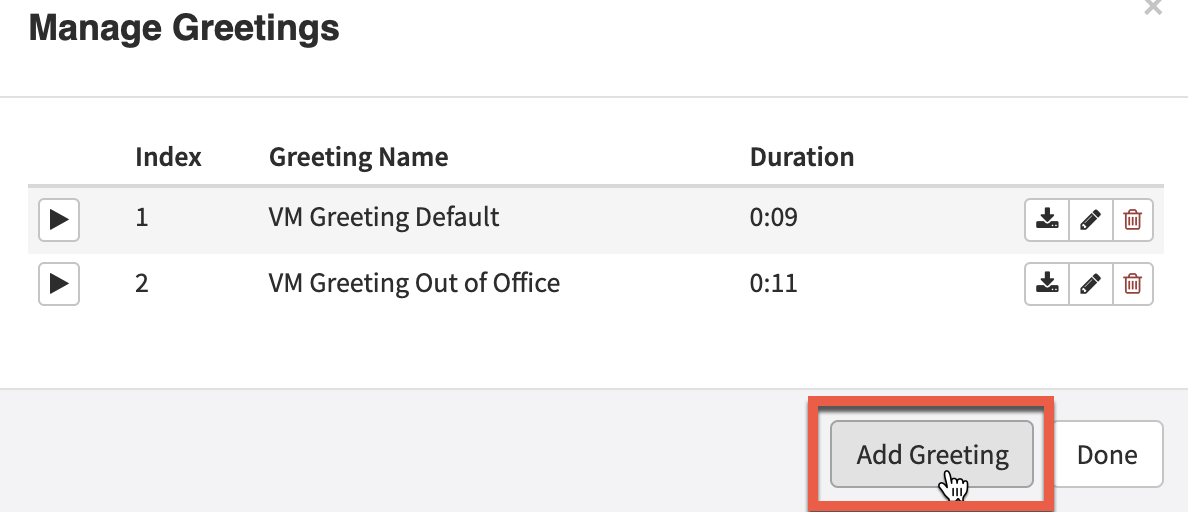
- In the menu presented, select the ‘Text-To-Speech’ option.
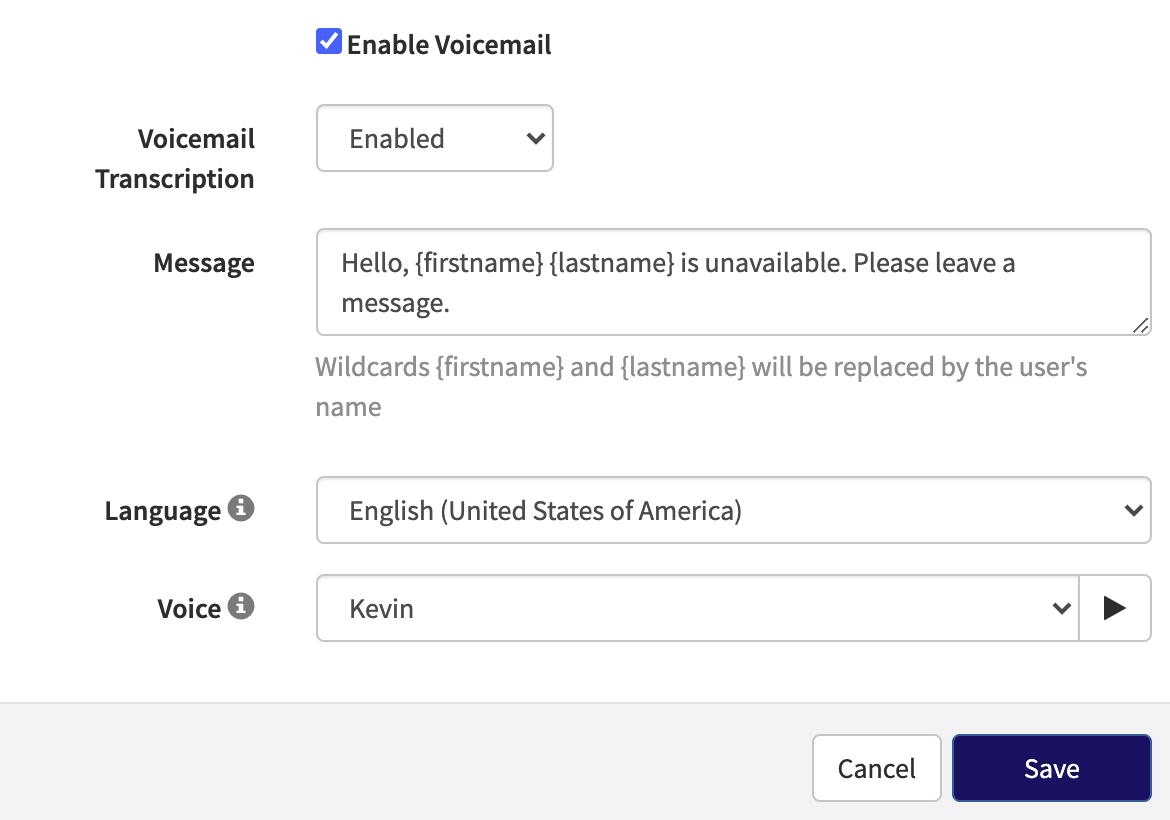
- Like all greetings, you will need to provide a name for this message and in the ‘Message’ field, you will type the greeting you want to be played using Text-To-Speech.
- Additionally, you can select and change the language and voice used when Text-To-Speech is enabled.


- Note: If you would like to preview a voice before saving your changes, simply click the ‘Play’ button to the right of the Voice selection.
- Once the greeting is to your liking, click the ‘Save’ button.
