How Can We Help?
Configure vBroadcast
Content
Concept
The Nex Gen Telecom vBroadcast application can be used to place outbound calls to a list of recipients. When a recipient answers the outbound call that was placed by the vBroadcast application, the application can take any of these actions:
- Play a pre-recorded audio file and hang up
- Play a pre-recorded audio file then transfer the call to a Call Center Agent
- Transfer the call to a Call Center Agent (with no pre-recorded audio file)
The vBroadcast application is designed to be used in conjunction with the Nex Gen Telecom WebContact Call Center Suite. Connected calls can be transferred to an Agent within the PBX Domain using an inbound trunk on the PBX. Outbound calls to recipients can be limited based on the availability of Agents such that the system will only make outbound calls if an agent is available to talk with the recipient.
In addition, the Nex Gen Telecom vBroadcast application can also be used for an SMS blast, which will send a message to a large number of recipients. An SMS-enabled telephone number should be selected to be used as the sender of SMS messages. It is highly recommended that this telephone number be set up to send inbound SMS messages to Nex Gen Telecom’s SMS Responder so that inbound messages will be replied with meaningful responses.
Configurations for Call Campaign
Create Recipient Group
To create a recipient group follow the steps below:
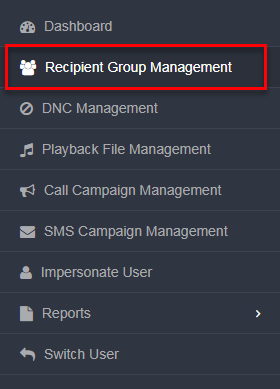
- Click on Recipient Group Management on the left navigation menu from the domain dashboard screen.
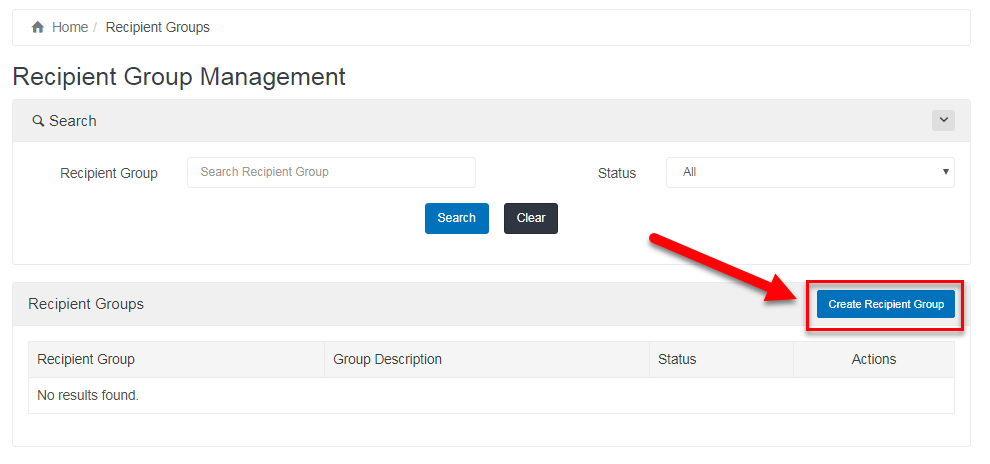
- The Recipient Group Management page will appear and from here click on the Create Recipient Group button.
- Fill in the necessary data. The table below lists the input fields and what is required for each.
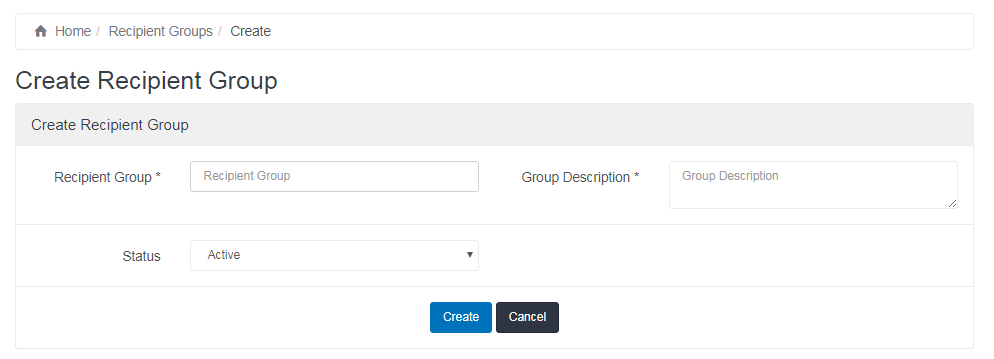 FieldRequired InputRecipient GroupEnter the name of the list you will be callingGroup DescriptionEnter a description of the list that you will be callingStatusActive
 - Click on the Create button to create the Recipient Group which will then appear in the list of all Recipient Groups belonging to the domain.
Recipient Groups
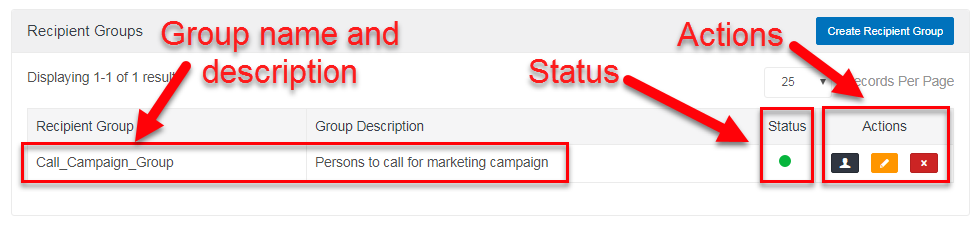
In the Recipient Groups list, you can:
- See the status (active
 or inactive
  ) of each group (Status column).
 - Perform several actions on the group (Actions column):
- Manage the recipients of each group by clicking on the Person icon
 ,
, - Edit the group details by clicking on the Edit icon
 , or
, or - Delete the group by clicking on the Delete icon
 .
.
- Manage the recipients of each group by clicking on the Person icon
Add or Manage Recipients
To add or manage existing recipients in a group click on the Person icon under the Actions column to open the group’s Recipients page.
Note: Maximum of 100 recipients only per group.
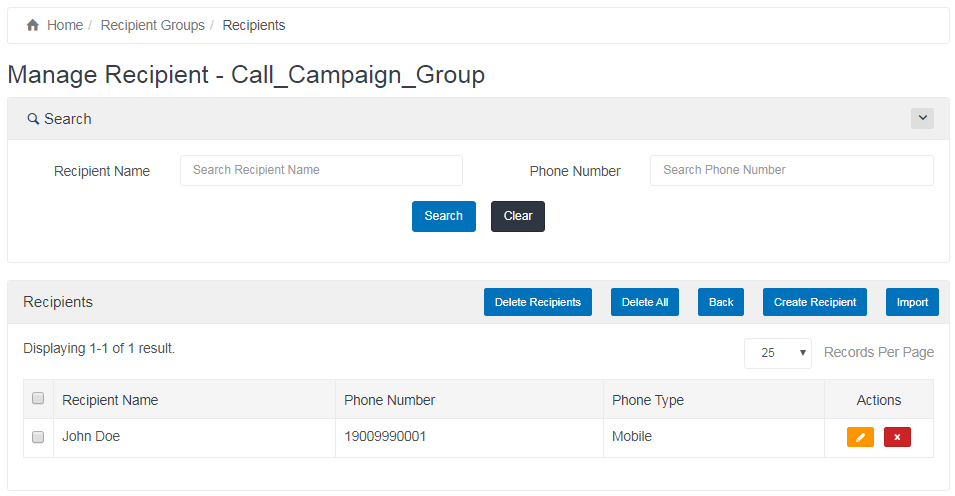
Adding Recipients Manually
To manually add a recipient to the list, click Create Recipient button.

Enter a name and corresponding phone number to the designated fields and click Create.
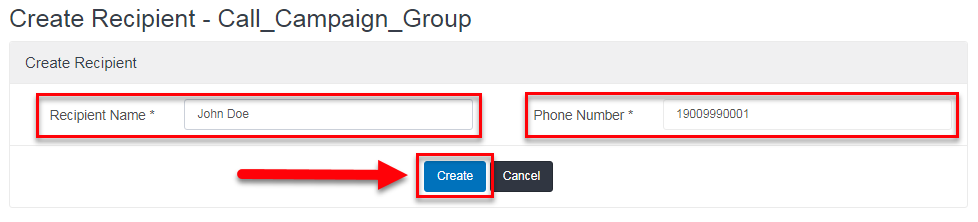
Phone numbers manually entered must be in the 11-digit format. US and Canadian phone numbers are allowed to be dialed from the vBroadcast application.
Importing Recipients
To import a list of recipients from a file, click Import.

Then click Browse, then choose a csv formatted file, then click the Import button. You may click on Download Sample File to get a template.
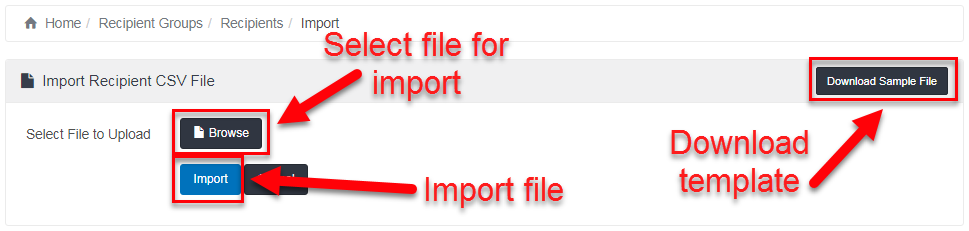
The content of the file looks like this.

Phone numbers uploaded to the recipient list must be in 11-digit format and should not contain any spaces or symbols.
Valid: 19009990001
Invalid: 1 900 999 0001
Invalid: 1(900)999-0001
Only US and Canada phone numbers are allowed to be called from the vBroadcast application.
Create Call Campaign
You will need to upload audio files (Maximum of 5MB file size) for your campaign. The audio files needed are:
- Introductory Audio Greeting – This is needed if the campaign is to do Answering Machine Detection.
- Campaign Audio File – This is needed if the campaign is to play an audio file instead of connecting to a human agent.
To create the call campaign follow the steps below:
- On the left side menu click Call Campaign Management.

- The Manage Call Campaign page will load then from here click the Create Call Campaign button.

- Fill in the necessary data. The table below lists the input fields and what is required for each.
 FieldRequired InputCampaign NameName of the CampaignCaller IDSelect the Caller ID Number that will be used when calling the recipients for this campaign. Recipient GroupsSelect one or more recipient groups to be called.Maximum Concurrent CallsEnter the total number of concurrent calls that you wish to make (must be 5 or less)Number of RetryEnter the number of times a recipient will be re-called if unreachable.Retry DelayEnter the number of minutes for the system to wait before retrying to call a recipient.Email IDsEnter the email address/es to send campaign completion reports to.Answering Machine DetectionChoose whether the application should try to detect when an answering machine has answered the call.Decision for AMDIf an answering machine is detected, you can choose to have the system either hang up or play a pre-recorded message. If the option Playback Message is chosen, then you must upload a .wav format audio file to be played.Playback File MachineThis only appears if Playback Message option is chosen in Decision for AMD. Here you can select your audio file or choose “Upload New Playback File” if the desired audio file is not here.Intro GreetingChoose an audio file to be played when a machine is detected. It is recommended that this be a .wav format audio file with a maximum length of 12 seconds. If your desired greeting audio file is not here, click “Upload New Playback File” to upload a new one.
Note: The Intro Greeting is played for the benefit of humans while the system is detecting whether an answering machine is present. If an answering machine beep is detected before the Intro Greeting is finished playing, the Intro Greeting will be discontinued and the announcement will be played.
Decision for HumanWhen a call connects to a recipient, the system can either play a pre-recorded audio file or transfer the call to the PBX.Playback File or Transfer Phone NumberIf the Playback Message option is chosen then you must upload a .wav format audio file to be played. If your desired playback audio file is not here, click “Upload new playback file” to upload a new one.If the Transfer to Agent option is chosen, then you must enter an 11-digit number that corresponds to a DID on the PBX that is routed to an appropriate call queue.Do Not Check Agent AvailabilityThis option controls whether the system will check the PBX for available agents before placing a call.Agent Call RatioThis option is only visible if the Do Not Check Agent Availability feature is unchecked. This setting controls the number of calls that vBroadcast will make relative to the agents available in a chosen queue. For example, if this is set to ‘1’ then the system will make one outbound call for each available agent in the chosen queue. If set to ‘5’ then the system will make five outbound calls for each available agent in the chosen queue.Queue NameThis option is only visible if the Do Not Check Agent Availability feature is unchecked. This drop-down selector allows you to choose the PBX queue that is checked for the agent availability calculation. - Click on the Create button to save the call campaign.
Run Call Campaign
After a campaign is created, you may run it by selecting the tag in the Status column.

Depending on the state of the Campaign, the options will be Start or Reset. Choose either of these options to begin the call campaign.

The various states of the campaign are depicted in this chart.
Note: A campaign that has started but was not configured correctly can’t be adjusted even if you change the status to Stop. You will need to set the status to Pause first and then edit.
SMS Campaign
Create SMS Campaign
The domain must have an SMS-enabled 800 number to be able to use the SMS Campaigns capability.
To create the campaign follow the steps below:
- Click on SMS Campaign Management on the left side menu.

- Click on Create SMS Campaign button.

- Fill in the necessary data. The table below lists the input fields and what is required for each.
 FieldRequired InputNameThe name you assign to the campaign.Sender NumberThis phone number will appear to the recipient as the sender of the SMS message. If your preferred number is not in this list, make sure that the number is in your Inventory in your Manage DID Portal and that it is enabled for SMS. The SMS Caller ID chosen should be one of your toll free numbers with SMS enabled. It should also be routed to the domain that is in use for this to work.Recipient GroupsChoose the recipient group that will receive the SMS message. (Only 1 may be selected)Email IdsEnter the email address/es to send campaign completion reports to.MessageThe content of the SMS message to send.Initial StatusChoose Immediately Fire if you want to run the SMS campaign after saving the campaign. Use Hold if you want to delay the running of this SMS campaign. You will be able to change the status to Created in the SMS Campaign Management page to run the campaign.ScheduleSet the Schedule for the campaign to run. This schedule is not to run the campaign in a recurring manner.
By default, the schedule is effectively “all days of the year”. Once a campaign is created and the schedule in the form is not changed, the campaign will immediately run.
However, if you want to run the campaign later (on the succeeding month or some hours later), change the schedule of the campaign.Samples Scenarios for Schedule:
If you want to run the campaign immediately after creation or every time it is reset but you do not want it to run on a weekend, set the Campaign Week Day Start to Monday and the Campaign Week Day End to Friday.
If the time of the creation of the campaign is 8 am and you want to run the campaign at 1 pm, set the Campaign Start Time to 13:00.
If you created the campaign on a July and you want to run the campaign on the succeeding month, change the Campaign Start Month to August. - Click the Create button to save.
Run SMS Campaign
After the campaign is created, you may run it by selecting the tag in the Status column. Depending on the state of the Campaign, the options will be Created or Reset. Choose either of these options to begin the SMS campaign.
SMS Campaign Status
 This is the status of a newly-created campaign and has never been processed yet. It will be processed once the schedule run of the campaign is reached.
 This is the status of a campaign that is currently in progress.
 This is the status of a campaign that has completed its run. Click on the Completed button to run the campaign again.

Note: A completed campaign can be re-run by changing the status to “Reset”.
Appointment Reminders
Terms
- Appointment – a person with a phone number and a schedule.
- Reminder – A notification message for a person with an appointment sent by call or SMS at a configurable duration before the appointment schedule.
Where To Record Appointments
Appointments are stored as a recipient group. It is recommended that you create at least one Recipient Group of type Reminder for each of your business entities.
For example, if you have a doctor’s clinic and beauty salon that would like to set up SMS or Call reminders, create one recipient group for the doctor’s clinic appointments and one recipient group for the beauty salon.
Proceed to create your Recipient Group. Provide a helpful name and description. On the Appoint Reminder Group, choose Yes. Status should be Active if you want it to start giving out appointment reminders to the persons that would be added to this group.

Upon setting the Recipient Group as an Appointment Reminder Group a new section will appear for the Auto-Delete section. Here you can have past appointments be deleted upon reaching a designated number of days past the current date.
To do this enable the Auto-Delete Past Appointments by clicking on the Yes radio button. You can then set the number of days past in the text box to the right.

On the “Older Than (days)” text box, supply the age of appointments to delete. Use a big number of days that you can comfortably call as an aged appointment.
The matching appointments will be deleted every midnight or GMT+0. The appointment consisting of name, phone number and schedule will be deleted. As such, it is recommended that, if you turn this auto-delete on, make sure you regularly download the list of recipients if you want to keep a copy of the names and phone numbers.
To disable auto-delete simply click the No radio button.
How to add appointments is discussed in a later section.
How To Configure Reminders
On the left navigation bar, navigate to Reminder Management. Click on Create Reminder Campaign button.
Supply your preferred campaign name and select your target recipient groups you just created.

Also, choose the campaign type.
- Call – Recipients will get their appointment notifications via calls to their phone numbers.
- SMS – Recipients will get their appointment notifications via SMS sent to their phone numbers.
- Both – Recipients will get their appointment notifications via call and SMS to their phone numbers.
Reminder Delivery via SMS
If your reminder will be delivered by SMS, choose the SMS Caller ID to be used. The SMS Caller ID chosen should be one of your toll free numbers with SMS enabled. It should also be routed to the domain that is in use for this to work.
You can format the content of your SMS message and use various keywords in the message text. To learn more about the various keywords and what they do just click on the Message Guide link.

Reminder Delivery via Call
If your reminder will be delivered by call, configure the following:

- Max Concurrent Calls – Enter the total number of concurrent calls that you wish to make (must be 5 or less)
- Call Caller ID – choose one of your phone numbers
- Number of Retries – the maximum number of call attempts if the recipient phone number is not reachable
- Retry Delay – number of minutes between call attempts
- Intro Greeting – Choose a playback file to be played as an intro greeting. Playback file should be in .wav format and with a maximum length of 12 seconds.
- Answering Machine Detection – Choose Yes if an answering machine is to be detected.
- Decision for AMD– What to do in case a machine is detected. Choose between:
- Hangup Call
- Playback Message – If chosen select a file for playback in the Playback File Machine portion.

- Call Message– Options for the message played when the call connects.
- Playback Message – This option will show a file chooser dialog for you to upload the audio file to be played

- Text to Speech Message– This option will convert to audio the text inside the message box. This has 2 sub-options:
- Similar To SMS Message – This copies the message written in the SMS section (see above portion) and grays it out. To edit the message you will have to do this in the SMS section message box.

- New Text – You can type your message in the message box.

- Similar To SMS Message – This copies the message written in the SMS section (see above portion) and grays it out. To edit the message you will have to do this in the SMS section message box.
- Message – This is the text to be converted to speech. Use $name as a placeholder of the recipient’s name and $datetime as a placeholder for the appointment schedule.
- Playback Message – This option will show a file chooser dialog for you to upload the audio file to be played
Set the Scheduling Information
In this section, you will set the schedule as to when the notifications will be sent.

- Notify On – The number of days before the appointment schedule that the reminder is sent. Options are 1 – 15 days or ‘Same Day’.

- Notify Time – The time of the day the notification should be sent.
- Effective Start Date – Date when the reminder program starts
- Effective End Date – This drop-down menu will let you either ‘Choose Date’ on when the reminder program ends or the ‘Never’ option which will keep the reminder program running continuously. Selecting Choose Date will show a date picker below for selecting the end date.

How To Add Appointments
There are two ways to add appointments, either by entering appointment information thru the vBroadcast portal or by posting appointment information via an endpoint webhook.
It is possible to have multiple appointment reminders for the same number.
Entering appointment information through the vBroadcast portal
- Go to the Recipient Group Management page via the menu on the left.

- Click on the Manage Recipients button
 of the recipient group where you will add a person’s appointment.
- Click on the Create Recipient button

- Supply details of a recipient to which an appointment schedule will be created.

Details to supply are:- Person’s name
- Phone number
- Appointment date
- Appointment time (The timezone is based on the time of the user who logged in.)
- Phone type (SMS or Call or Auto-Detect)
- Click the Create button to save the appointment.
By posting appointment via HTTP Webhook
- On the Recipient Group Management page, select the Recipient Group of type “Reminder” to where you will add a person’s appointment.
- Click on the edit icon of the Recipient Group.
- In the Webhook section, take note of the token displayed. This will be used in your HTTP POST to the vBroadcast webhook.
- Click on the Copy Token button.

- Click on the API Integration Guide link to know more about this. The guide shows the HTTP POST REQUEST template and explanations of the parameters to be passed.
- Click on the Save button to finalize.
List of Appointments
All the appointments are listed in a table. For easier management, it is indicated if the appointment is a Past appointment or a Future one. Only future appointments will receive notifications. Note also that how well in advance the notification is given is dependent on the Notify On (can be configured for the number of days before the schedule) discussed above.

From here you can:
- Delete Recipients – Done by either clicking on the red x icon beside the recipient entry under the Actions column. Or selecting multiple recipients via the check boxes beside each recipient entry and clicking the Delete Recipients button.
- Delete All Recipients – Click on the Delete All button to do this.
- Return to the Recipient Group Management page – To return click on the Back button
- Create Recipient – as discussed in the previous section
- Import Recipients – Select a prepared file with appointment information and import it into the appointment list via the Import button. A template can be downloaded through the import page.

- Export Recipients – Clicking on the Export button will download a CSV format file containing these appointment schedules.
Send Now Feature
The vBroadcast application allows users to send appointment reminders immediately instead of waiting for the next schedule of reminder notification time. This feature is useful when businesses want to send immediate SMS or Call messages such as emergency notices to customers who are already in their reminder recipient lists.
Sample scenario for use:
You are a doctor and would like to announce to those with appointments on a certain date that you will be unavailable due to an unforeseen emergency and that instead, they can call a number to have the appointment moved.
Select the reminder campaign whose recipients you intend to send an immediate message by clicking the Send Now icon ( ).
).

You will then be redirected to a series of pages:
- Recipient List
- Message Content
- Final Confirmation
At the bottom of the pages, you are shown a set of dots (shown below) that indicates where you are in the series of pages.

Recipient List page
The first page allows you to select/trim the list of recipients for the Send Now feature. The recipients are from the same Recipient Groups as defined in your chosen Reminder Campaign.

The options for selecting the recipient list are done through a search based on Schedule, Recipient Name, Phone Number, and Phone Type.
Schedule options are:
- Having appointment in the next # days
This will show recipients who have an appointment during the current date and the indicated # of days away (e.g. If the current date is January 5 and the indicated number is 3 it will show appointments from January 5-8)
- Having appointment between
You may choose recipients who have appointments between specific dates. Click on the date picker to choose the start and end dates for the search.
- Having a future appointment
You may choose all recipients who have future appointments.
- Having a past appointment
You may choose recipients who have past appointments.
- All appointments
Or, you may choose all appointments which means all people with appointments either in the past or future.
Recipient Name option:
You may trim down the list based on Recipient Name. You can use full or part of the name in the text box and choose in the drop-down list whether the recipient name to select Contains, Starts With, Equals, or End With the search parameter. If you intend to filter only by Recipient name, choose “All appointments” in the Schedule options.

Phone Number option:
You may trim down the list by filtering full or partial phone numbers. If you intend to filter only by phone number, choose “All appointments” in the Schedule options.

Phone Type option:
You may trim down the list by selecting the phone type. “Both” for all numbers, “Call” for landline and mobile numbers, “SMS” to exclude landline numbers.

Click the  button to show the results based on the search options.
The recipients matching the search will be shown in a table at the bottom of the page.

If there are more than 20 recipients, this area will instead show a count of the affected users.

Review the list. If satisfied, click the  button. Otherwise, modify and repeat the recipient filtering.
Message Content page
On the next page, you are shown the current Reminder Campaign settings for SMS and/or Call Reminder. You may modify these settings here.

Click the Proceed button if satisfied with the settings or click the Back button if you want to change the recipients.

Final Confirmation page
Once you proceed, you will be shown the number of recipients that will receive the SMS or Call. This is your final chance to review the action.

Click on Send Now when certain or Back if there is something to change.

Clicking the Send Now button will submit the request for queueing in the server. This message will be shown if successful.

As with normal reminder notifications, the Send Now notifications will show up in the Reminder Detailed Report.

API Integration Guide
View your Recipient Group which is of type Reminder. Copy the token displayed on the page.

You will use this token when using the vBroadcast webhook for adding or removing appointment schedules.
Security Note: If you think your token has been compromised, click the “Create New Token” and click Save. Use the new token in your client application that posts new appointments to the vBroadcast Webhook.
Adding an Appointment
From your client application, send an HTTP Request using this format:
curl --location --request POST 'https://vbroadcast.nexgentelecom.net/index.php?r=api/addappointment/' \
--header 'Content-Type: application/json' \
--data-raw '{
    "token":"qXbbZ6KoR0R7q4obeGVqKGYMO6R0eP",
    "name":"John Smith",
    "phone_number":"12023334545",
  "appointment_date":"2020-01-30",
    "appointment_time":"14:00",
    "phone_type":"SMS"
}'
HTTP Method and Endpoint:
POST https://vbroadcast.nexgentelecom.net/index.php?r=api/addappointment/
Body Parameters:
- token – The token for the target Reminder configuration.
- name – Name of the person with an appointment. Max of 50 characters.
- phone_number – Phone number of the person with an appointment. This must include country and area code. For a US and Canada phone number, it must start with 1 and will be 11 digits long.
- appointment_date – Date of the appointment in yyyy-mm-dd format.
- appointment_time – Time of the appointment in hh24:mi format (24 hour format)
- phone_type – CALL for wireline. SMS for mobile.
Note that the timezone followed is the timezone of the campaign creator, usually the business owner or the region in which the business is located. The timezone is usually displayed in the title bar of the table.

HTTP Response
- 200 – Appointment stored successfully
- 400 – Failed request. See “message” attribute for the explanation.
Sample Response:
400
{
    "status_code": 400,
    "message": "Invalid Phone Type passed"
}
Removing an Appointment
From your client application, send an HTTP Request using this format:
curl --location --request DELETE 'https://vbroadcast.nexgentelecom.net/index.php?r=api/addappointment/' \
--header 'Content-Type: application/json' \
--data-raw '{
    "token":"qXbbZ6KoR0R7q4obeGVqKGYMO6R0eP",
    "phone_number":"12023334545",
    "appointment_date":"2020-01-30",
    "appointment_time":"14:00",
}'
HTTP Method and Endpoint:
DELETE https://vbroadcast.nexgentelecom.net/index.php?r=api/addappointment/
Body Parameters:
- token – The token for the target Reminder configuration.
- phone_number – Phone number of the person with an appointment. This must include country and area code. For a US and Canada phone number, it must start with 1 and will be 11 digits long.
- appointment_date – Date of the appointment in yyyy-mm-dd format.
- appointment_time – Time of the appointment in hh24:mi format (24 hour format)
If an appointment of exactly the same phone number and appointment_date and appointment_time is found, it will be deleted.
SMS Subscription Keywords
Industry standards require that recipients of text messages be able to opt-out of receiving SMS messages. Accordingly, vBroadcast will recognize the following keywords:
- STOP
- END
- CANCEL
- UNSUBSCRIBE
- QUIT
STOP or UNSUBSCRIBE or END or CANCEL or QUIT
When a recipient sends any of these keywords to a phone number that is used in a vBroadcast campaign the system automatically disables any future SMS messages from the vBroadcast to the sending number.
SUBSCRIBE or UNSTOP
When a recipient sends any of these keywords to a phone number that is used in a vBroadcast campaign the system will allow any future SMS messages from the vBroadcast to the sender number.
Where to see list of Unsubscribed SMS Numbers
- Log in to your vBroadcast portal.
- On the left navigation button, click on the Unsubscribed SMS Numbers menu item. You will be shown a list of numbers that have unsubscribed.

- DID Number – this column shows the number to which the number on the right unsubscribed from.
- Customer Number – this column shows the numbers that are unsubscribed from the DID on the left.
- Unsubscribe Date – the timestamp of when the unsubscribe request was sent. The timezone is displayed at the title bar of this table.
Note: It is not possible for users of vBroadcast to add or remove customer numbers to the unsubscribe list. Only the phone number holders can do that by sending the right keywords.
Reports
The vBroadcast application provides several reports you can access this by clicking on Reports on the left side menu and selecting either Call Detailed Report, Call Summary Report or SMS Detailed Report.

Note: The Campaign ID beside the Campaign Name will help you identify new or old campaigns.
Call Detailed Report
The Call Detailed Report shows the following information. This report is only available at the Domain view.

SMS Detailed Report
This report lists all the SMS campaigns that ran.
Click on the Details button to go into the page listing all the phone numbers that were sent out with the campaign’s SMS message.

Appointment Reminder Report
You can view a report of the reminders set up by going to the Reports menu and in the sub-menu click on Reminder Detailed Report.

Here you will see the list of reminders for both Call and SMS Reminders. You can filter by Date Range and/or by choosing the Campaign Name to narrow down your results.

If your search turns out without results, it will indicate ‘No results found.’. Note that search results are different for Call and SMS Reminders.
You may click on the Export to CSV button to download this detailed report.